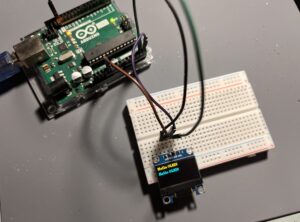
ESP8266 NodeMCU + 128*64 SSD1306 OLED
ESP8266プラットフォームのインストール
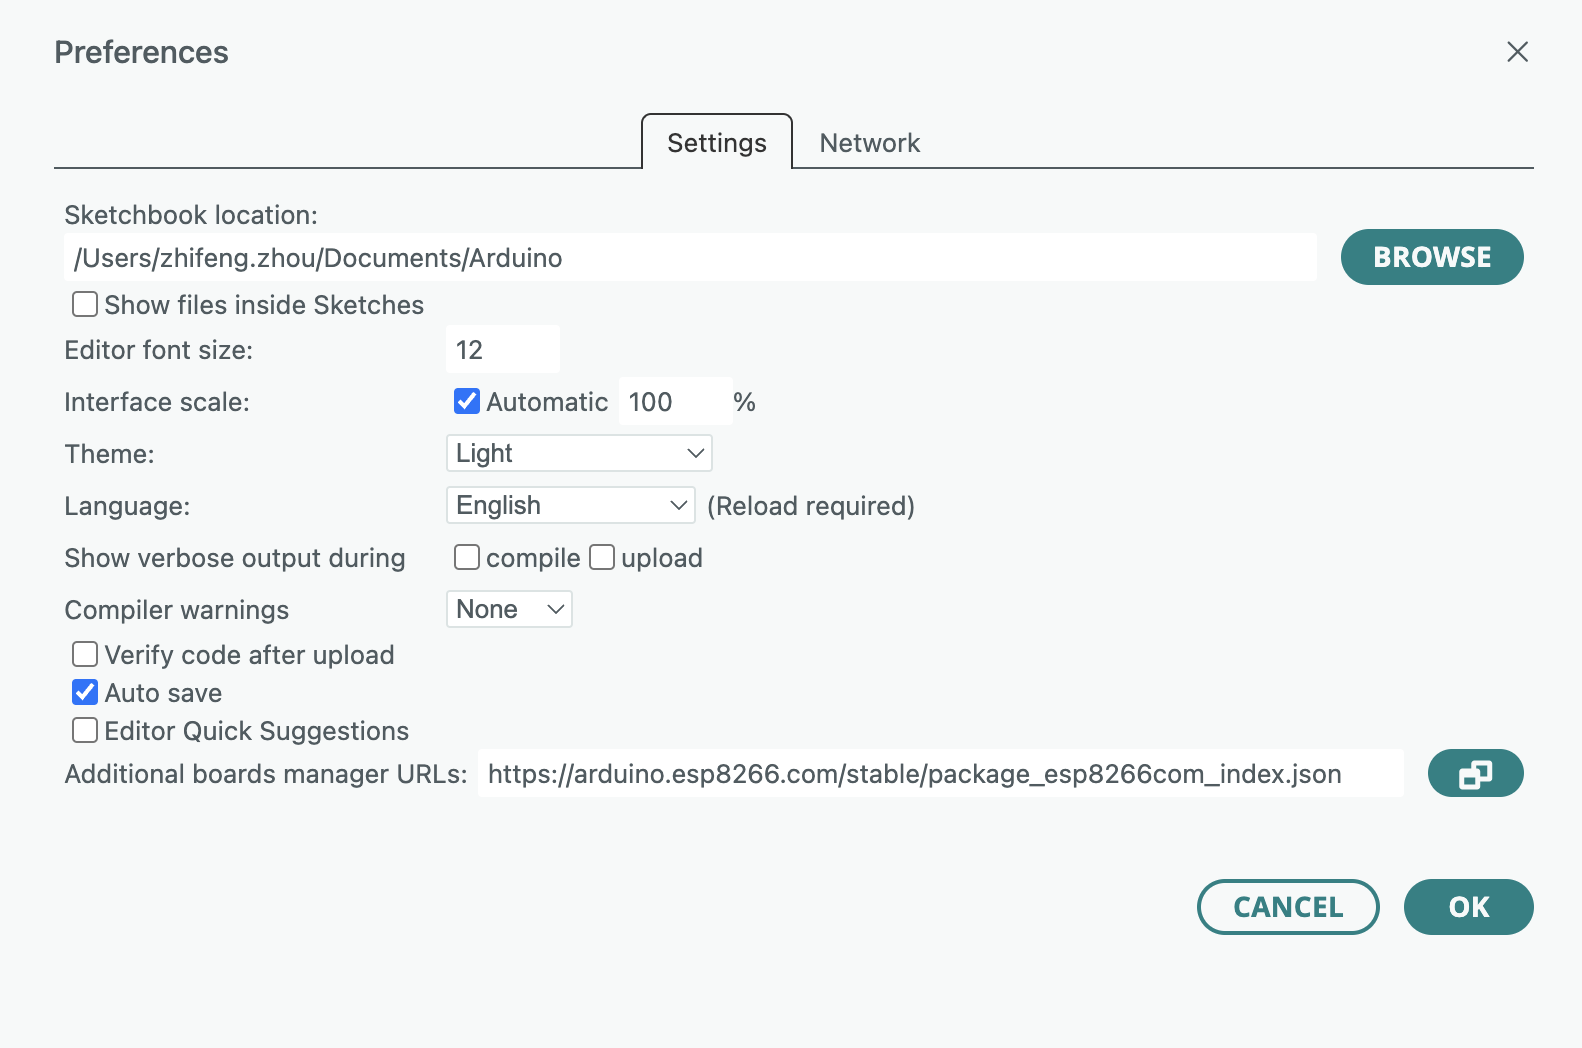
1. Arduino を起動し、「Preferences(環境設定)」ウィンドウを開きます
2. Arduino IDE の File > Preferences > Additional Boards Manager URLs に、以下のURLを入力します:
https://arduino.esp8266.com/stable/package_esp8266com_index.json
複数のURLを追加する場合は、カンマ( , )で区切って入力してください。
3. 「Tools」 > 「Board: xxxx」 メニューから 「Boards Manager...」 を開き、esp8266 プラットフォームをインストールします。
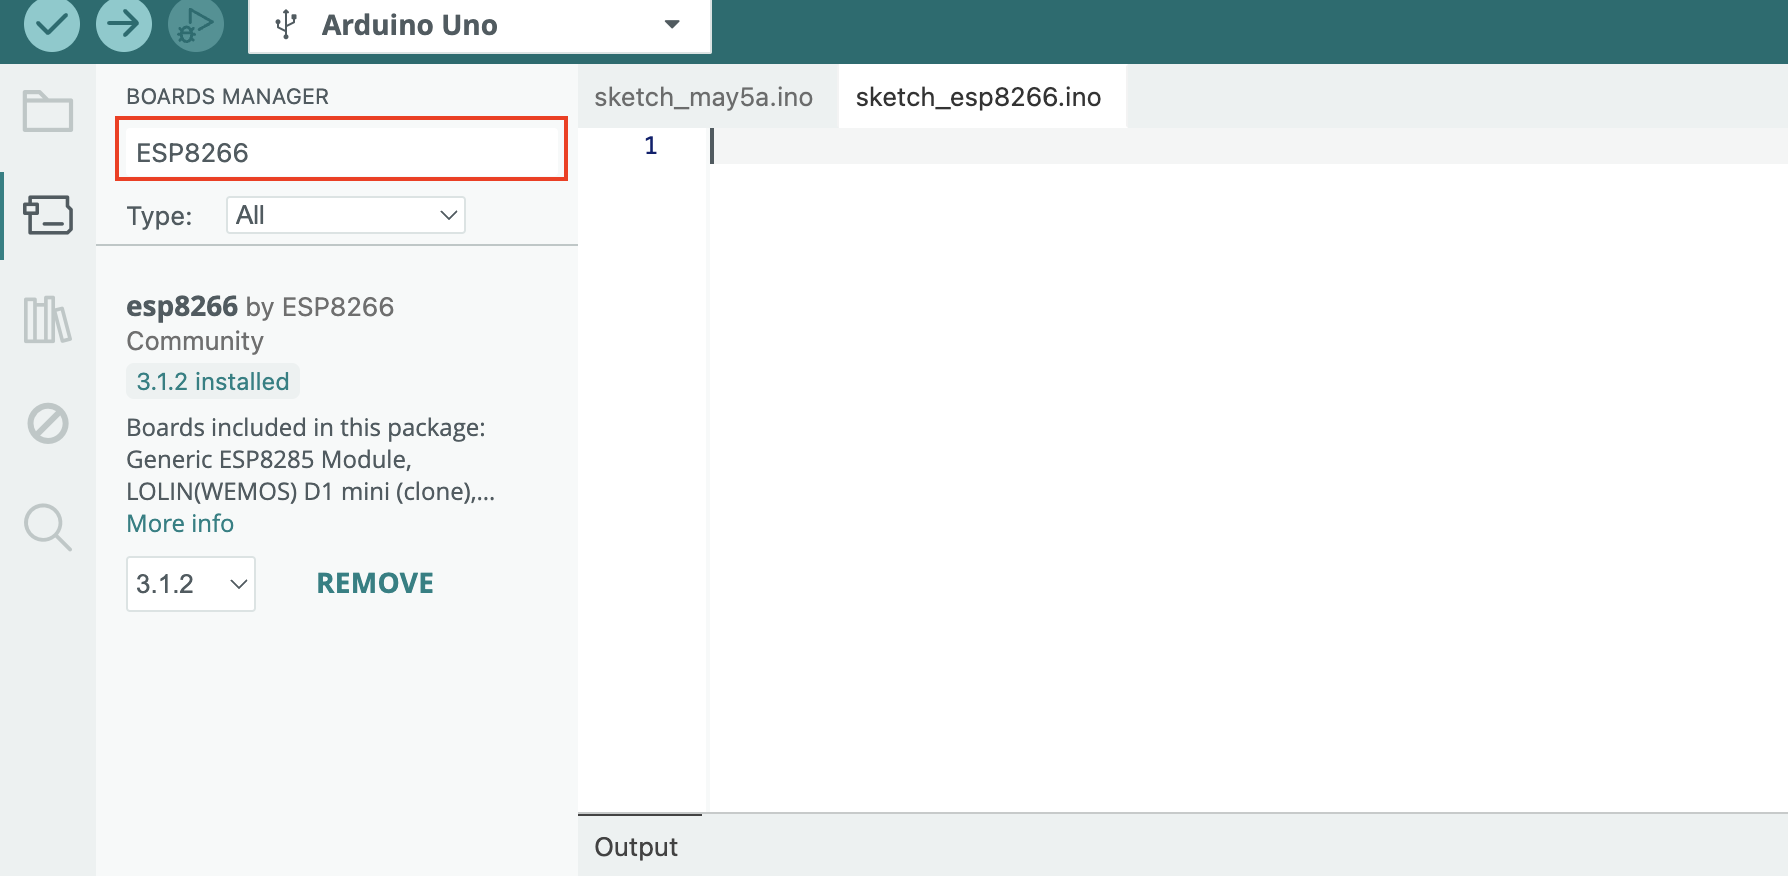
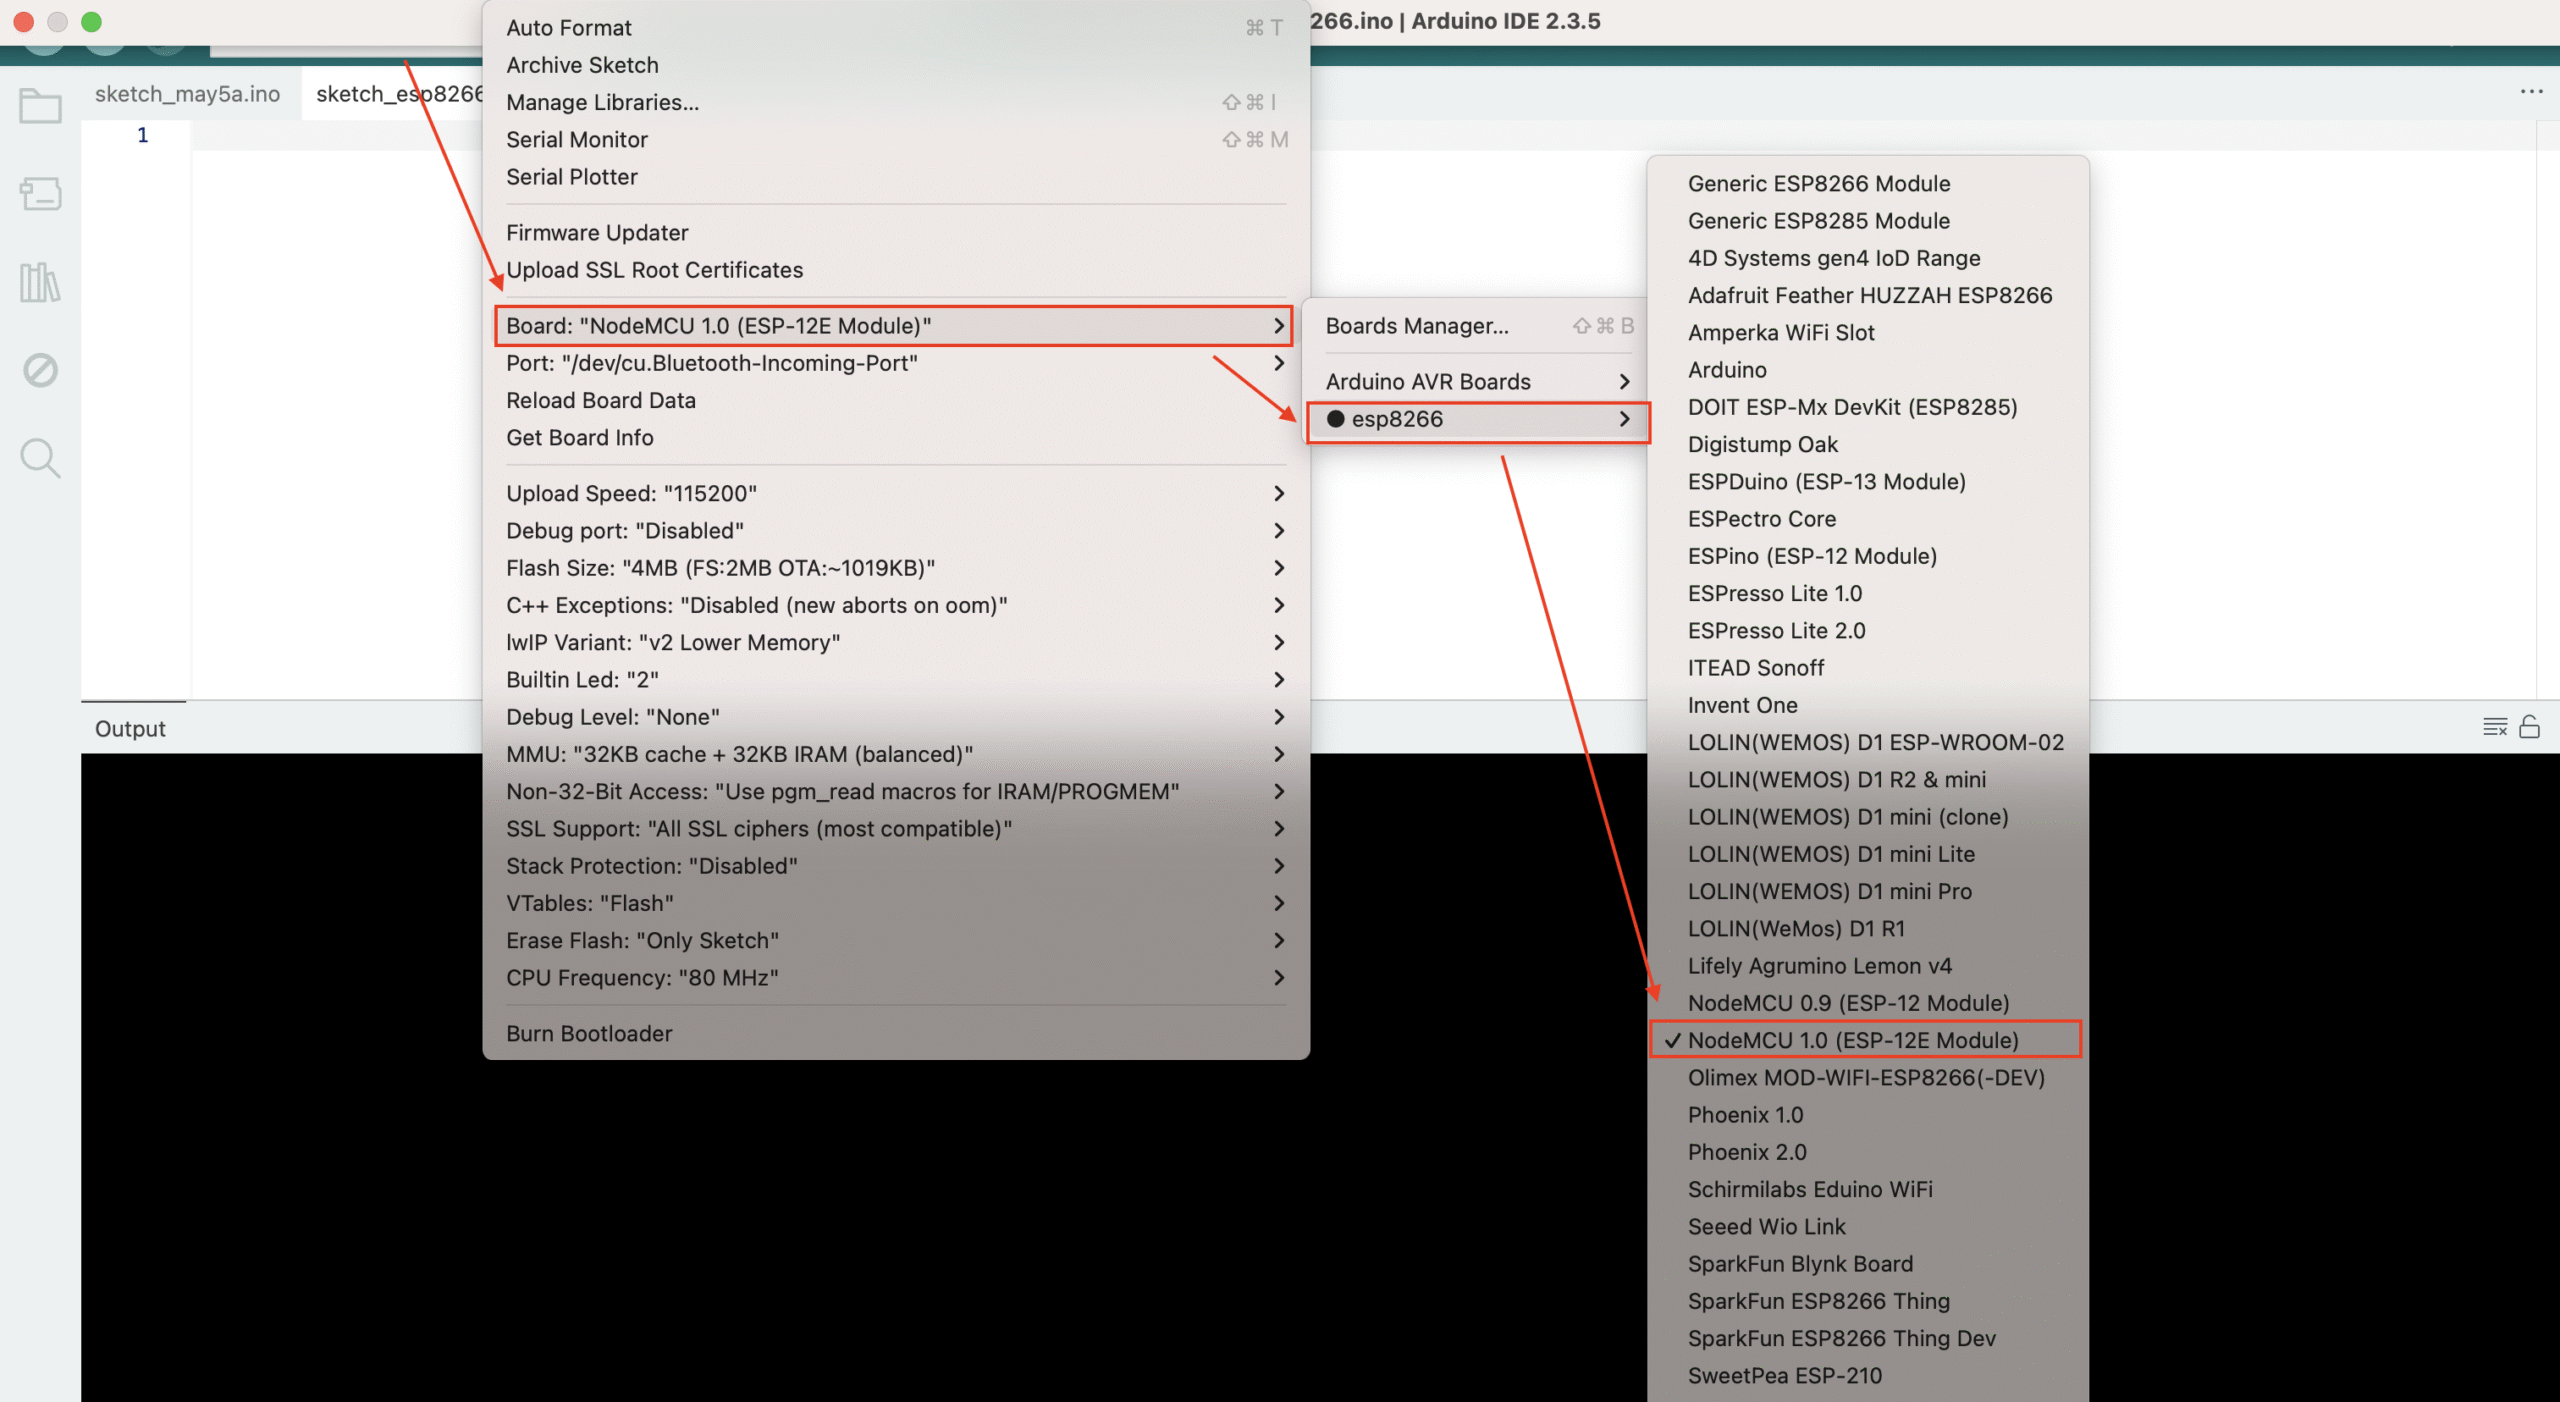
インストール完了後、「Tools」 > 「Board: xxx」 メニューから使用する ESP8266 ボードを選択してください。
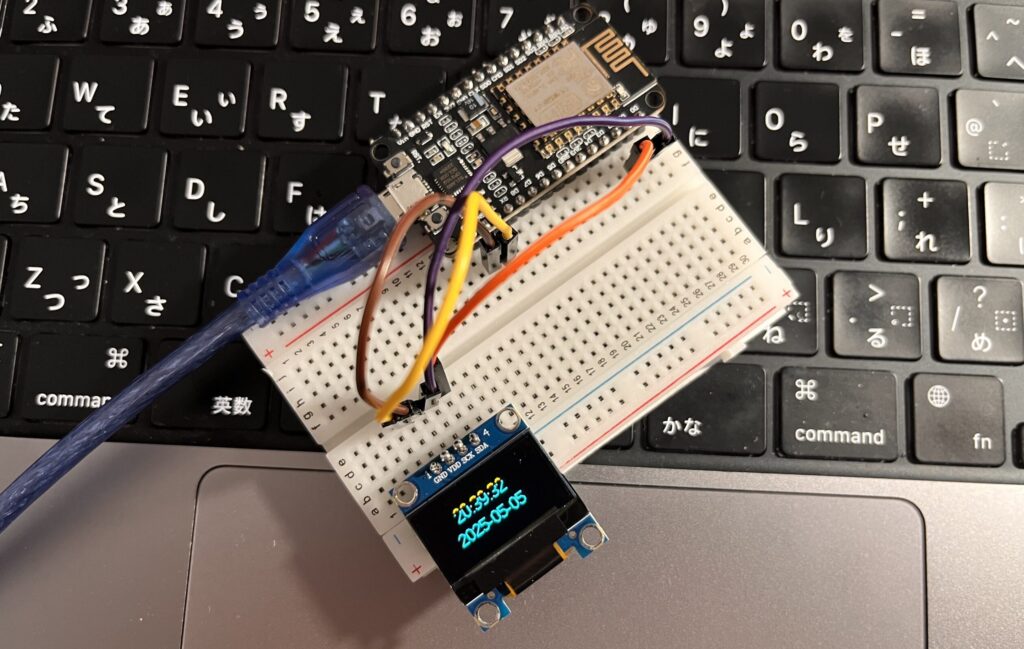
ESP8266とOLEDの接続
| ESP8266 | OLED |
|---|---|
| VCC | 3.3V電源 |
| GND | GND |
| SCL | D1(GPIO5) |
| SDA | D2(GPIO4) |
一部のOLEDモジュールでは、SCLとSDAの代わりに CLK(クロック)や DAT(データ)などのラベルが付いている場合がありますのでご注意ください。
サンプルコード
参考コード:https://github.com/printlndarling
/* 本代码适用于ESP8266 NodeMCU + 128*64 SSD1306 OLED显示屏
*
* 此代码实现了连接WiFi,并自动从ntp服务器同步时间和日期,并且显示在屏幕上,
* 实时刷新,同时设定了115200波特率与PC进行通信,当PC发送"ON"时,
* esp8266便会打开led灯,并在屏幕显示灯已打开,当发送"OFF"时,
* 便会关闭led灯,当发送的其他内容时,esp8266便会将接收的内容打印
* 显示在oled屏幕上。
*
* 4pin IIC引脚,正面看,从左到右依次为GND、VCC、SCL、SDA
*      ESP8266  ---  OLED
*      3.3V     ---  VCC
*      G (GND)  ---  GND
*      D1(GPIO5)---  SCL
*      D2(GPIO4)---  SDA
*
*
* auther: 繁星_逐梦  https://github.com/printdarling/esp8266_clock
*/

#include <ESP8266WiFi.h>
#include <Wire.h>
#include <U8g2lib.h>
#include <TimeLib.h>
#include <time.h>
#include <sys/time.h>


#define SCREEN_WIDTH 128
#define SCREEN_HEIGHT 64

U8G2_SSD1306_128X64_NONAME_F_SW_I2C u8g2(U8G2_R0, D1, D2, U8X8_PIN_NONE);

const char *ssid = "ssid"; //改为您的WiFi名称
const char *password = "password"; //改为您的wifi密码

const char *ntpServerName = "pool.ntp.org";

int hr, mint, sec, dayy, mon, yr;

const int maxCharsPerLine = 16;

void setup()
{
  Serial.begin(115200);
  pinMode(LED_BUILTIN, OUTPUT);
  digitalWrite(LED_BUILTIN, HIGH);//默认关闭led灯

  u8g2.begin();
  u8g2.enableUTF8Print();
  u8g2.setFont(u8g2_font_wqy12_t_gb2312);
  u8g2.clearBuffer();
  u8g2.setCursor(0, 15);
  u8g2.print("开机");
  u8g2.setCursor(0, 30);
  u8g2.print("正在连接WiFi");
  u8g2.sendBuffer();
  delay(1000);

  WiFi.begin(ssid, password);

  while (WiFi.status() != WL_CONNECTED)
  {
    delay(500);
    Serial.print(".");
    u8g2.print(".");
    u8g2.sendBuffer();
  }
  u8g2.clearBuffer();

  Serial.println("");
  Serial.println("WiFi connected");
  u8g2.setCursor(0, 15);
  u8g2.print("WiFi连接成功!");
  u8g2.sendBuffer();
  delay(1000);
  u8g2.clearBuffer();

  // configTime(8 * 3600, 0, ntpServerName);
  // 设置时区为日本(UTC+9)
  configTime(9 * 3600, 0, "ntp.nict.jp", "ntp.jst.mfeed.ad.jp");
  time_t now = time(nullptr);
  struct tm *local_time = localtime(&now);

  hr = local_time->tm_hour;
  mint = local_time->tm_min;
  sec = local_time->tm_sec;

  yr = local_time->tm_year + 1900;
  mon = local_time->tm_mon + 1;
  dayy = local_time->tm_mday;
}

void loop()
{
  // configTime(8 * 3600, 0, ntpServerName);
  // 设置时区为日本(UTC+9)
  configTime(9 * 3600, 0, "ntp.nict.jp", "ntp.jst.mfeed.ad.jp");

  time_t now = time(nullptr);
  struct tm *local_time = localtime(&now);

  yr = local_time->tm_year + 1900;
  mon = local_time->tm_mon + 1;
  dayy = local_time->tm_mday;

  hr = local_time->tm_hour;
  mint = local_time->tm_min;
  sec = local_time->tm_sec;

  u8g2.clearBuffer();
  u8g2.setFont(u8g2_font_wqy16_t_gb2312);

  // 同时显示时间和日期
  int textWidthTime = u8g2.getStrWidth("00:00:00");
  int xPosTime = (SCREEN_WIDTH - textWidthTime) / 2 - 5;
  u8g2.setCursor(xPosTime, 25);
  u8g2.print(formatDigits(hr, 2));
  u8g2.print(":");
  u8g2.print(formatDigits(mint, 2));
  u8g2.print(":");
  u8g2.print(formatDigits(sec, 2));

  int textWidthDate = u8g2.getStrWidth("0000-00-00");
  int xPosDate = (SCREEN_WIDTH - textWidthDate) / 2 - 5;
  u8g2.setCursor(xPosDate, 45);
  u8g2.print(String(yr));
  u8g2.print("-");
  u8g2.print(formatDigits(mon, 2));
  u8g2.print("-");
  u8g2.print(formatDigits(dayy, 2));

  u8g2.sendBuffer();
  delay(1000);

  // 接收消息并显示
  if (Serial.available())
  {
    String msg = Serial.readStringUntil('\n');
    Serial.println(msg);

    u8g2.clearBuffer();
    u8g2.setFont(u8g2_font_wqy12_t_gb2312);
    int yPos = 15;
    int lineHeight = u8g2.getMaxCharHeight();
    String line = "";

    if(msg == "ON"){
      digitalWrite(LED_BUILTIN, LOW); // turn on LED
      Serial.println("已开灯!");
      msg = "已开灯!";
    }else if(msg == "OFF"){
      digitalWrite(LED_BUILTIN, HIGH);  // turn off LED
      Serial.println("已关灯!");
      msg = "已关灯!";
    }

    for (int i = 0; i < msg.length(); i++)
    {
      char currentChar = msg[i];
      line += currentChar;
      char lineArray[line.length() + 1];
      line.toCharArray(lineArray, line.length() + 1);
      int charWidth = u8g2.getUTF8Width(lineArray);
      if (charWidth > SCREEN_WIDTH || i == msg.length() - 1) // 检查行宽度是否超过屏幕宽度或到达末尾
      {
        u8g2.setCursor((SCREEN_WIDTH - charWidth) / 2, yPos);
        u8g2.print(line);
        yPos += lineHeight;
        line = "";
      }
    }

    u8g2.sendBuffer();
    delay(3000);
    u8g2.clearBuffer();
  }
}

String formatDigits(int number, int digits)
{
  String result = String(number);
  while (result.length() < digits)
  {
    result = "0" + result;
  }
  return result;
}
Ref:
https://github.com/esp8266/Arduino?tab=readme-ov-file#installing-with-boards-manager
https://github.com/printdarling/esp8266_clock
oxxo